So, you’re ready to transform your home with a new floor? Fantastic! But before you get started, there’s one crucial piece of the puzzle you need to consider: the floor installation kit. This handy set of tools is your ticket to a smooth, efficient, and professional-looking floor installation. Whether you’re laying down hardwood, laminate, or vinyl, a floor installation kit can make all the difference. Let’s dive into everything you need to know about these kits, from what they include to how to use them effectively.
What Is a Floor Installation Kit?
A floor installation kit is a collection of tools and accessories designed to help you install flooring materials with ease. These kits typically include everything you need to ensure your new floor is installed correctly and looks great. But what exactly do these kits contain?
Key Components of a Floor Installation Kit
- Tapping Block: A small, but mighty tool, the tapping block helps you snugly fit your floorboards together without damaging the edges.
- Pull Bar: This tool is essential for those hard-to-reach spots where a tapping block can’t quite do the job, like the edges of the room.
- Spacers: These little guys are critical for maintaining an even gap between the floor and the wall, allowing for natural expansion and contraction.
- Mallet: A rubber mallet is perfect for tapping the boards into place without causing any damage.
- Measuring Tape: Precision is key in floor installation, and a good measuring tape ensures your cuts are accurate.
- Utility Knife: For cutting underlayment or trimming flooring materials, a sharp utility knife is a must-have.
Why Use a Floor Installation Kit?
You might be wondering, “Do I really need a floor installation kit?” The short answer is: absolutely! Here’s why.
Benefits of Using a Floor Installation Kit
- Professional Finish: Using the right tools ensures your floor looks professionally installed, with tight seams and even edges.
- Time-Saving: These kits are designed to make the installation process faster and more efficient.
- Ease of Use: Even if you’re a DIY novice, a floor installation kit simplifies the process, making it accessible to everyone.
- Cost-Effective: By avoiding mistakes and potential damage, you’ll save money in the long run.
Step-by-Step Guide to Using a Floor Installation Kit
Ready to get started? Follow these steps to ensure a flawless floor installation.
1. Prepare Your Space
Before you even open your floor installation kit, it’s essential to prepare the room. Remove any existing flooring, clean the subfloor, and ensure it’s dry and level. Measure the room to determine how much flooring material you’ll need.
2. Lay the Underlayment
Underlayment provides a smooth surface for your new floor and helps with soundproofing and insulation. Roll it out across the entire floor, cutting it to fit with your utility knife.
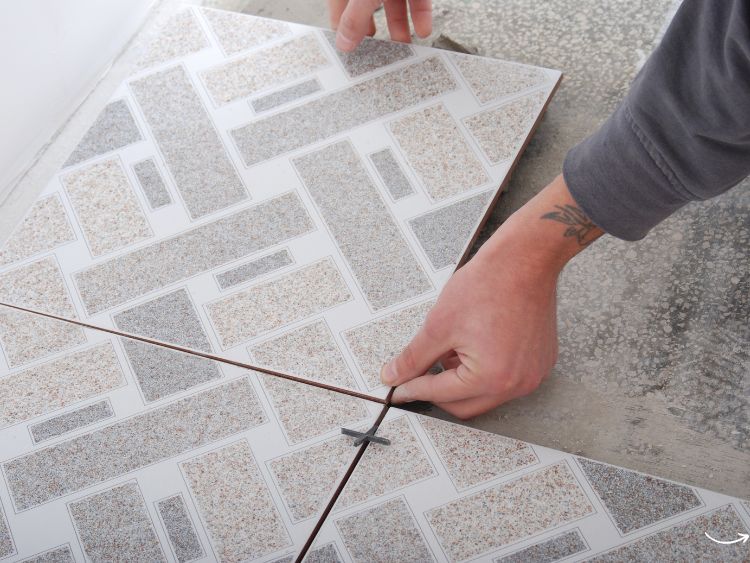
3. Start Laying the First Row
Place spacers along the walls to maintain an expansion gap. Begin laying your first row of floorboards along the longest wall, ensuring they’re straight and aligned. Use the tapping block and mallet to secure the boards together.
4. Use the Pull Bar for Tight Spaces
As you reach the edges of the room, use the pull bar to snugly fit the boards together. The pull bar allows you to apply pressure without damaging the boards.
5. Continue Laying the Flooring
Work your way across the room, row by row. Remember to stagger the seams for a more natural look. Use the tapping block and mallet to secure each board.
6. Trim and Fit Around Obstacles
When you encounter doorways, vents, or other obstacles, measure carefully and use your utility knife or a saw to trim the boards to fit. Always double-check your measurements to avoid mistakes.
7. Finish with the Final Row
The last row might require some trimming to fit. Use the pull bar to ensure the boards are tightly placed together. Remove the spacers once all boards are in place.
FAQs About Floor Installation Kits
What types of flooring can I install with a floor installation kit?
You can use a floor installation kit for various types of flooring, including hardwood, laminate, and vinyl. The tools in the kit are versatile and designed to work with multiple materials.
Do I need any additional tools?
While a floor installation kit includes most of the essential tools, you might need a few extras depending on your specific project, such as a saw for cutting floorboards and a leveling tool to ensure your subfloor is even.
Can I reuse my floor installation kit?
Absolutely! Floor installation kits are durable and can be reused for multiple projects. Just make sure to keep the tools clean and in good condition.
How do I maintain my new floor?
Maintenance depends on the type of flooring you’ve installed. Generally, keep your floor clean by sweeping or vacuuming regularly and avoid excessive moisture. For specific care instructions, refer to the manufacturer’s guidelines.
Is it difficult to install flooring myself?
With the right tools and a bit of patience, installing flooring can be a manageable DIY project. A floor installation kit simplifies the process, making it accessible even for beginners.
Conclusion
Installing a new floor can be a rewarding project that transforms your home. By using a floor installation kit, you’ll ensure a professional finish, save time, and make the process much more manageable. Remember to prepare your space, follow the steps carefully, and use the right tools for the job. Happy flooring!
Authoritative Links
- https://www.familyhandyman.com/project/how-to-install-laminate-flooring
- https://www.thisoldhouse.com/flooring/21015181/how-to-install-a-hardwood-floor
- https://www.hgtv.com/design/remodel/interior-remodel/how-to-install-vinyl-plank-flooring
And there you have it—a comprehensive guide to using a floor installation kit! With these tips and tools in hand, you’re well on your way to achieving a beautiful new floor.